Instagram videos offer a great way to promote your project, but getting them from Premiere to IG can be a little complicated.
So you’re working on a project, it’s going great but it’s not done yet. Nevertheless, you want to post some clips on Instagram. Getting a clip from Premiere Pro to Instagram is a little harder than it should be. Why? Because you can’t publish directly to Instagram from a computer, you have to go through your phone. But if you’re editing your video in Premiere, it’s not on your phone.
Here are 3 easy steps to getting your videos onto Instgram
Make an Instagram-friendly sequence
In your Premiere project, select File>New>Sequence (Command+N). You’ll get the New Sequence dialogue box. Follow the instructions in these images to work your way through the settings:
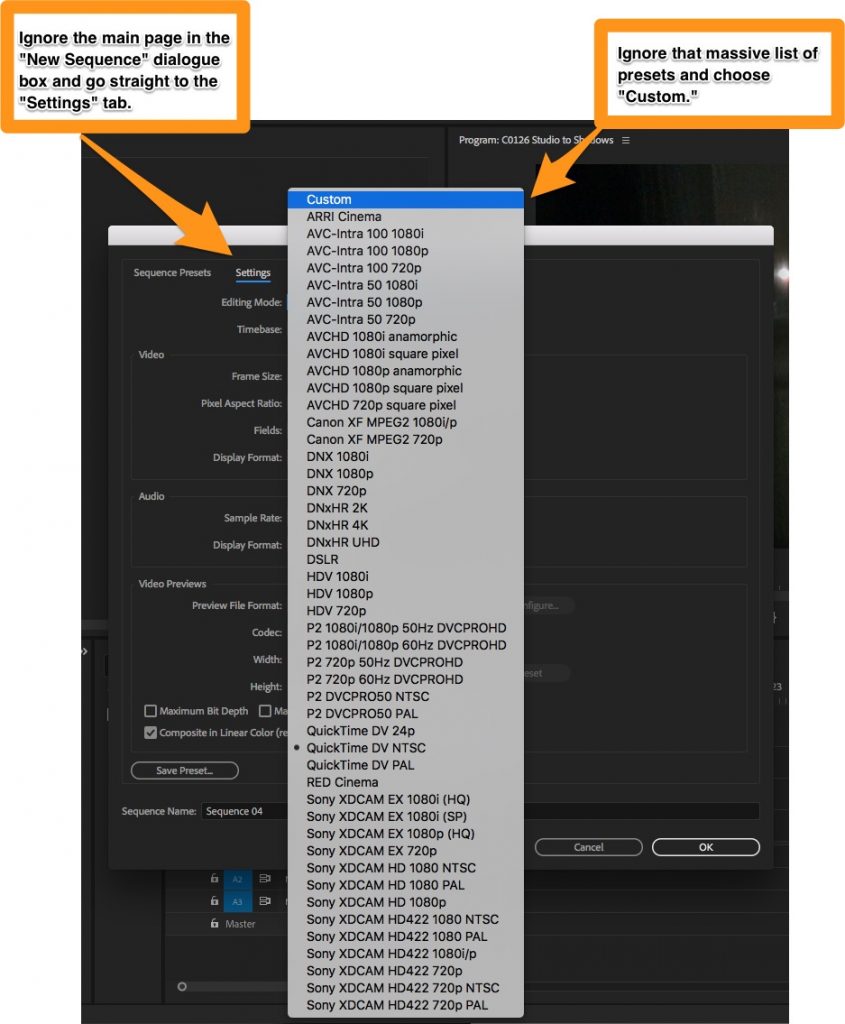
Ignore the main page of the New Sequence dialogue box and go straight to the Video tab.
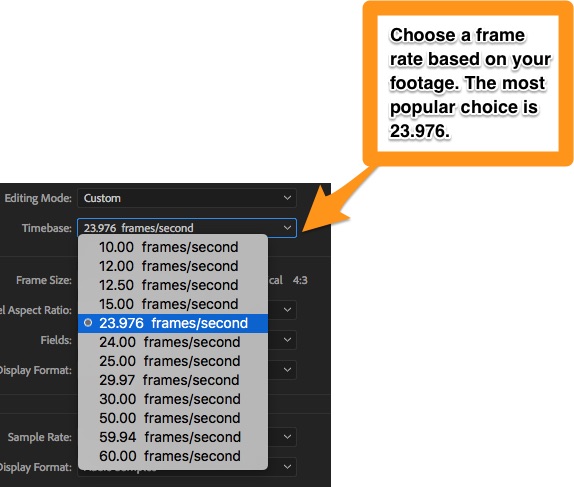
Choose the standard frame rate of 23.976.
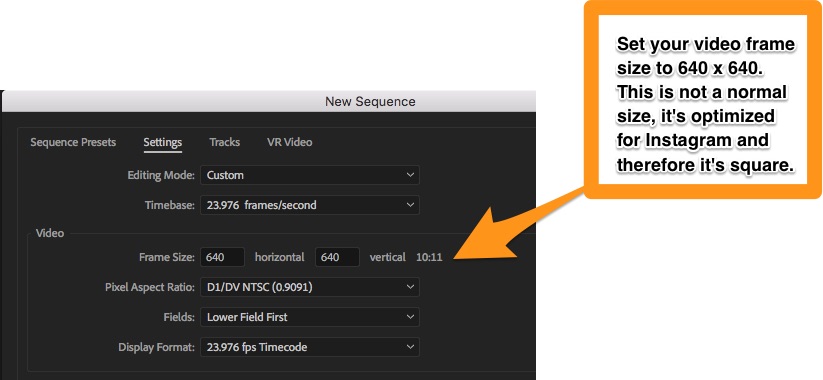
Set a frame size of 640 x 640 pixels, which is best for Instagram.
By the way, you don’t have to make is square just because it’s Instagram. If you prefer a standard widescreen choose 360 x 640. If your project is destined for Instagram “Stories” (not the regular feed), the standard HD size 1920 x 1080 is preferred.
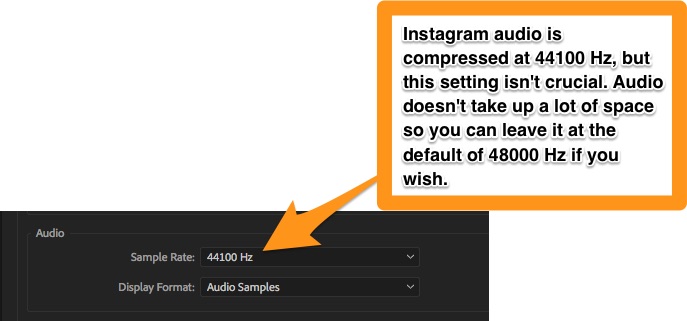
Adjust the audio settings if you wish, or just leave it at the default.
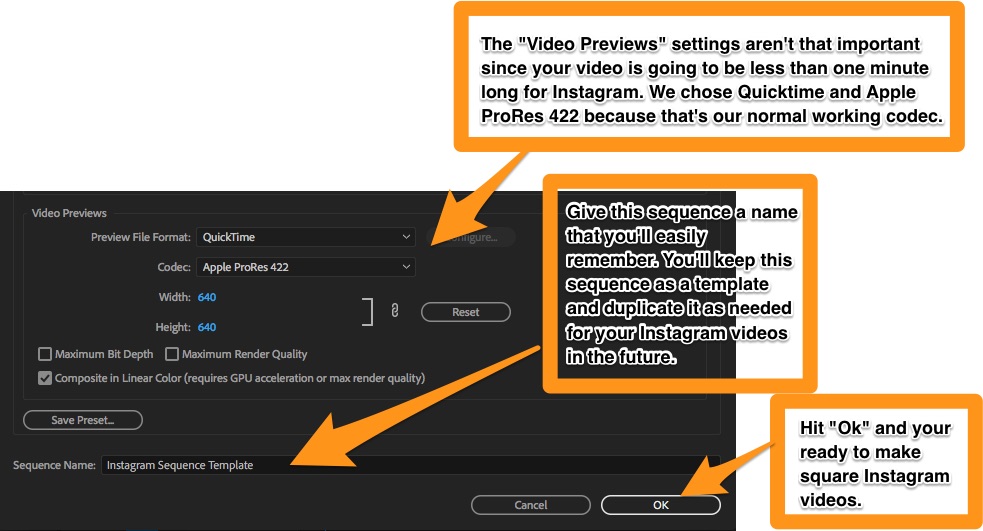
Choose a your favorite video preview codec or just leave it at the default.
Save your preset with a name that you’ll remember and hit “Ok.” Now you’ll have a new sequence in your Project window. You can use this one as a template for all your future IG videos so that you won’t have to go through these settings again. Duplicate it (Command+C, Command+V) and change the name of the duplicate and you’re ready to start editing! You’ll notice immediately that the sequence is square and your widescreen video isn’t going to fit properly. You’ll have to navigate to the effects tab in the Premiere Source monitor and scale your video. We shot 4K video so scaling it at 30% worked well. Obviously, this video is going to be cropped to fit the square format of Instagram.
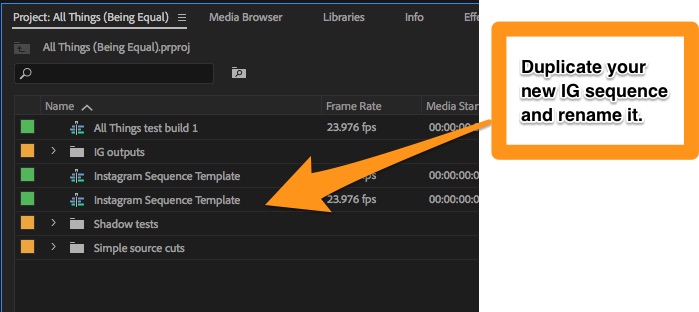
Duplicate your IG template sequence and rename it.
While you’re editing, remember that Instagram limits the length of video in the main feed to 60 seconds and “Stories” can only be 15 seconds. Btw, I’d like to take a moment to complain about the use of the word “story” to describe a 15 second video: it’s not a story, it’s a shot or a clip. For all of us filmmakers who spend so much time working hard to tell actual stories on film/video, it’s kind of frustrating to see the word appropriated for something that really isn’t even a story. But really, who cares. They’ll probably be gone in a few years, like AOL and My Space. But for now, keep your “stories” to 15 seconds on IG 🙂
There’s also a file size limit of 4GB for each clip. If you use the settings decribed in this post and stick to the time limits, you won’t have a problem with file size.
Export your clips to an Instgram-friendly format
Now that you’re done editing, it’s time to export your clips. Use these export settings to get it right.

Create new custom settings for your IG exports.
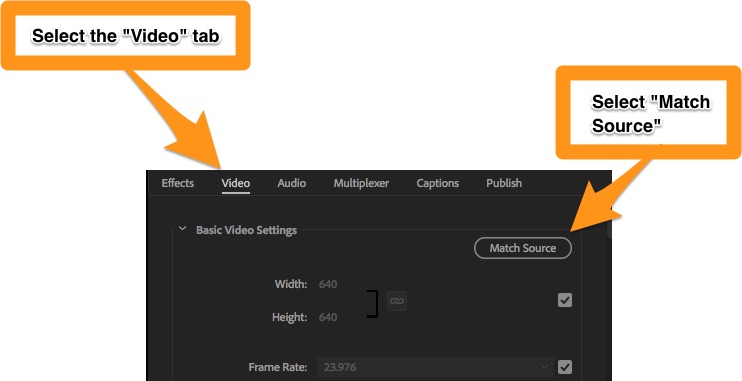
Go to the Video tab and select “Match Source.”
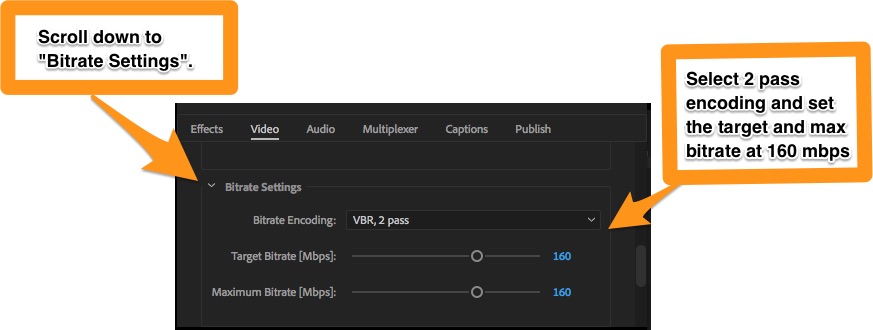
Set the bitrate encoding to 2-pass at 160 mbps for better quality.
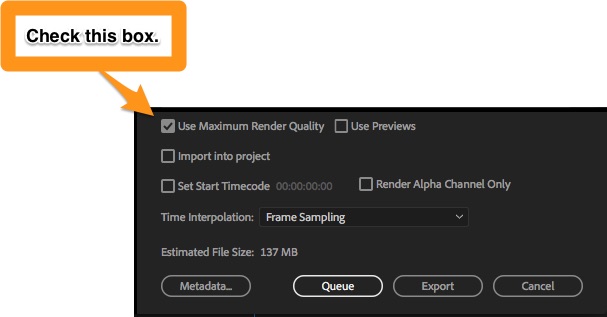
Select “Maximum Render Quality” for a high-quality export.
G
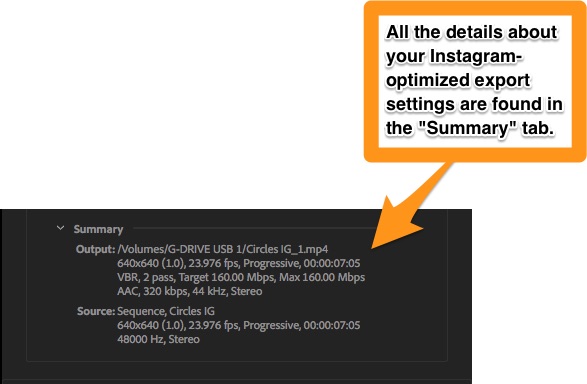
The “Summary” tab provides all the details about your settings.
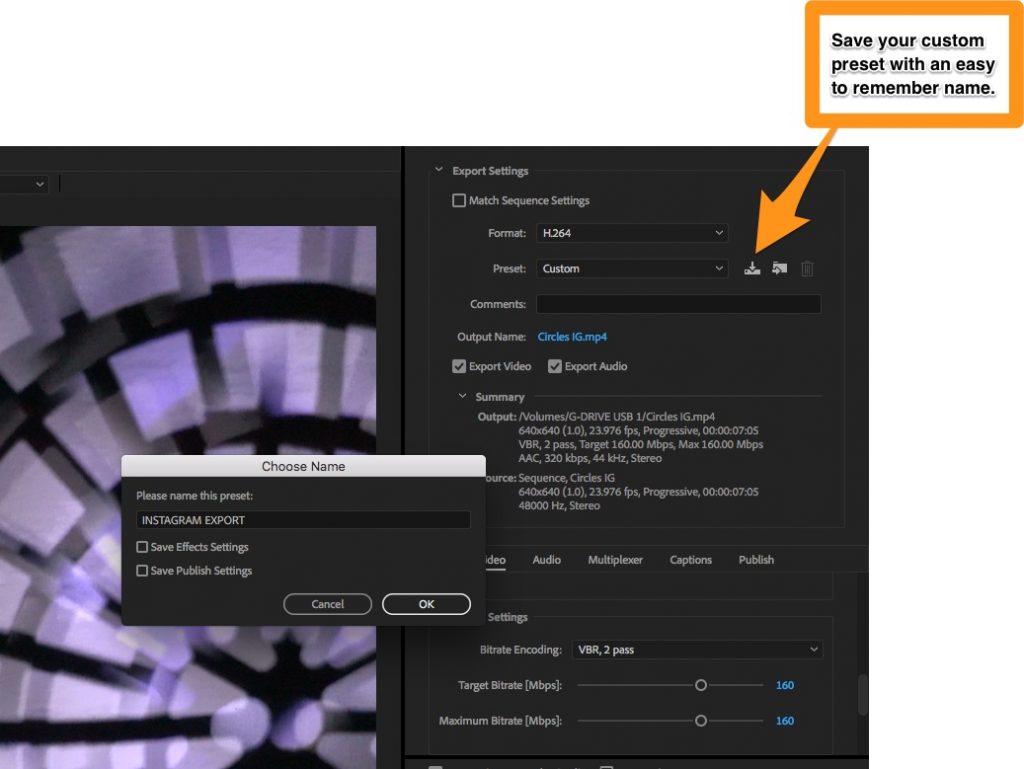
Save your custom Instagram export preset so that you can use it next time.
That’s it. After you save your custom IG preset, hit either “Export” or “Queue” to finish your video. “Export” means that Premiere will export your video right away and you’ll have to wait while it works. Typically it won’t take very long because your IG videos are limited to 60 seconds total. If you have a lot of clips to export, select “Queue,” which will send them to Adobe Media Encoder. Media Encoder works in the background so you can keep editing in Premiere while your clips export.
Move your video clips to your phone
Most video files are kind of big, even 60 second clips. So you’ll probably need an intermediary file transfer service such as Dropbox, Apple AirDrop, or Google Drive. That means you’ll need the corresponding app on your phone. Once you have your clips on your phone in one of these apps, it will be pretty easy to publish them on Instagram.
That’s it! And now you have all the presets so the next time it will just take a few seconds.
